
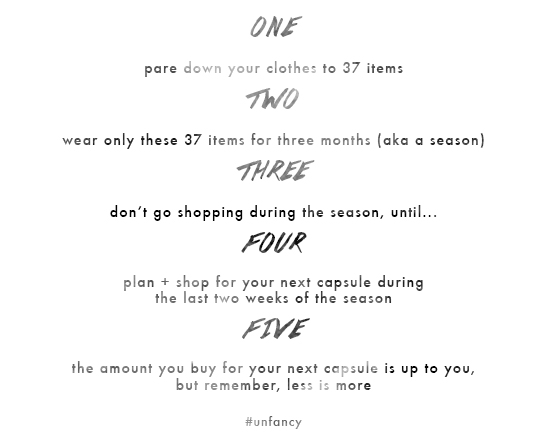
If you don’t know what a Capsule Wardrobe is, here is a great explanation from the creator Caroline herself:
(photo cred: un-fancy.com)
There are some fun rules as well, but I wasn’t doing this to follow rules per-say.I just wanted to have a less cluttered closet, with less stress on finding what to wear, more room to be creative for what I have, and stop spending money on clothes I don’t need. I love Carolines quote:
I remembered why I do it:Â So I can do more meaningful things with my time and energy. So I can avoid emotional purchases, avoid overspending. So I can build an intentional wardrobe that makes me want to do a happy dance.
I decided to go with the number 50 and maybe eventually I will scale down from there. I was very pleased at how my closet turned out. I love patterns and color, so my capsule closet is a bit brighter than most peoples, but hey what can I say I am just not a black and white girl.
So here is my before closet (the bottom is all workout tops, that’s for another day):

And after:Â

Side by Side: (I promise there are about 50 items less)

I am donating a ton to goodwill and friends. The stuff I wasn’t 100% sure about a put in a box and will take out in three months and see if I even missed it. I also stuck with all white hangers and that helps the de-clutter look a lot!

As far as pants and shorts, I narrowed them down to just a few.

I put up four dressed that I know I will wear this summer and about eight pairs of shoes (not including running shoes, those are in the garage).

My goals for myself are to pair down even more as well as not shop for three months for a single item. If I feel like I don’t have anything to wear, then it is time to get creative! The hardest part of this challenge is just finding time to do it. It takes time to sort through everything, but in the end it is quite freeing!
Question: Do you think a capsule wardrobe is something you could do or are doing?Â
]]>
I have had a ton of people ask me for healthy crockpot meal recipes, but another awesome way to try new crockpot recipes without making them all yourself is to do a Meal Exchange!
What is a Meal Exchange?
It is where you get 8-12 ladies together and swap meals! So fun and so wonderful especially through the HOLIDAY SEASON!

I’m so excited for our next meal exchange at my house on (DATE and TIME). Please don’t be late in case anyone needs to grab their meals and go.
A few important details:
1. If you are not going to do the exchange please let all of us know by this (DATE) so it gives everyone time to prepare the meals and buy the appropriate amount of groceries.
2. Be sure to bring an ice chest to take your meals home in and a large laundry basket to place in your number spot with all of us to grab a meal from. Think of it sort of like a “trunk or treat”… you bring your meals in the basket and drag your ice chest along with you to each of our baskets, picking up a meal along the way until you have all your meals.
3. Below is the list of those who are joining. Be sure to label all your meals with your number listed next to your name. For example I’m #1 so “#1” will be written on all my meals.
4. Include a 3×5 card in a zip lock bag in every meal with cooking directions on one side and the recipe on the back. Put it in the zip lock bag so it can go in the freezer with the meal.
5. All meals need to be freezable.
6. The meals need to be crockpot ready or oven ready. (It can also be something super fast to cook on the stove top – 10 minutes or less)
7. When you know what you are going to make, please reply to all so we can all see what meals are being prepared. We don’t want to end up with 10 chicken soups :/
8. All dinners need to serve AT LEAST 6 people.
We are limiting this Meal Exchange to no more than 12 people so if you know of someone who wants to do it, have them email me soon.
1. Bobbi
2. Jane
3. Sarah
4. Cassie
Etc.
—-
EASY RIGHT?! Then you will have 8-12 meals in your freezer to pull out and enjoy in a flash! Yes, the one day of prep to make 12 meals for everyone else takes some time, but you are making the same thing so just make an assembly line and it will go by fast!
This time around I made Pumpkin Coconut Curry! The best thing to do is to go Pinterest and find some really yummy crockpot meals.

Friends have been asking about my Fall wreath, so I thought I would share a post I did about it last year:)
I saw this super cute wreath on Pinterest and clicked on it it took me to Etsy where it cost WAY MORE then my budget called for. It looked simple enough, so I thought what the heck why not give it a try, I used to be pretty good with a glue gun!

Turns out I still got it! Now I wished I had an awesome step by step post that told you ever single step of how I made this wreath, but sadly I have two full time jobs and have to have time to make fun things like this so I don’t! But I will do my best to tell you how you can make one of these cute wreathes on your own! You ready??

What you will need:
- One giant branch wreath from craft store
- Two different color burlap fabrics ( about 1/4 of yard of both)
- Fun garland and or flours for decor
- One wood letter
- Hot glue gun and glue
- Time!
- Little wood sign
- Twin like rope (under the letter)
- Chalk board spray paint
- Chalk

]]>
 t been so great at sharing with all of you the fun stuff I have made!
So Thursdays I will now be bringing you all a Pinterest Project! I thought this would be fun to encourage you all to start putting those pins to good use! I hope you all enjoy the fun posts.
A couple weeks back I pinned this Jewelry Hanger and it looked simple enough and something that I would totally use! So I ran to Joanne’s and Home Depot and got to it.

I couldnâ€t decide what fabric I wanted to use, so I bought both of these. Fabric is so cheap so I couldnâ€t go wrong to get both.

What you will need:
- one old cork board
- fabric that covers the entire cork board
- 6 drawer nobs and 3 drawer handles
- fabric pins with fun tops
- staple gun
- drill
Directions:
First I took my old cork board and covered it with the fabric I chose. I wrapped the ends around the cork board and stapled them down to the back

Then I screwed in the drawer nobs. The best way to do this is to drill a hold in to the board and then put the nob through.

I did the same thing with the drawer handles. Arenâ€t the earrings on them the cutest?

Then I lined the entire board with some fashionable fabric pins to give it a little depth.

I even added a fun little bow to add my studs to.

I probably would have loved it more if it had more solid of a pattern, but it goes in a corner in my bathroom where only the Hubâ€s and I can really see it. But I do love it for itâ€s use and it was super easy to make! It was also cheap. I am pretty sure the whole project cost me less then $10 to make!

I have so many more projects to show you! I canâ€t wait ![]()
Question: Are you a fan of Pinterest?
]]>
When I married a Southern boy, I didnâ€t know what I was getting myself into ![]() I think itâ€s funny that we have a huge garden, but my hubby doesn’t eat a single vegetable from it! Heâ€s a farmer, but he loves his meat and potatoes. I think he should start growing tomatoes and raising cattle!!!
I think itâ€s funny that we have a huge garden, but my hubby doesn’t eat a single vegetable from it! Heâ€s a farmer, but he loves his meat and potatoes. I think he should start growing tomatoes and raising cattle!!!

This past weekend my dear friend Megan and I took on the grand task of CANNING! I have canned tomatoes once before, but this my friends was a whole new ball game.

We had over 30+pounds of tomatoes and veggies that we had to make good use of!!!

Easiest way to get the skin off of tomatoes is BLANCHING THEM! You just drop them in boiling water for 30 seconds to a minute take out with a slotted spoon and dump them in a big bowl of ice cold water (with ice in it). The skin falls right off! This is how you get the skin off of peaches as well.


I bought this wonderful Ball Jar Home canning kit from Fresh & Easy. As well as half pint and full pint Ball jars.


It was so great have a friend help in the kitchen. It cut the prep time in half and when friends have fun kitchen toys, like a mandolin (Christmas wish list) it makes it a lot easier to cut up veggies!

We had a ton of cucumbers we pickled.

As well as banana peppers and jalapenos.

If you think canning is overwhelming, donâ€t be frightened! Itâ€s actually quite simple. We just followed recipes from a few different canning cookbooks and boiled the jars in big pots of hot water. I promise if I can do it, you can do it!

This, my friends, was only half of all the wonderful things we canned.

 |
 |
 |
 |
 |
 |
…and of course homemade fresh tomato garlic spaghetti sauce!


The best part of all of this is, we plan to give most of it away! Hello homemade Christmas gifts!!! Itâ€s the gift that keeps on giving. We still have more pumpkin and veggies, so I plan on making pumpkin butter and more marinara.
Questions:
Have you ever canned before?
Do you have a garden?
I feel like I have so much to catch up on with you all  It’s been a great week! The first week of December is always a lot of fun. We always go to Disneyland to start the season off with fun (no stressful Holiday here). I also got most of my decorating done, tree is going to be decorated this weekend!! We are waiting for my Mother in Law to come in town today so she can help
I have been doing some AWESOME workouts with the Holiday Shred folks. If you were hesitant to sign up, but still might be interested please feel free to email me!! It’s been a lot of fun and the workouts are kicking everyone’s butts!!!
A WinnerÂ
I didn’t forget about the THANKFUL GIVEAWAY! I do have a winner Drum roll please….
The winner is…Heather from Running with Sass!! CONGRATS girl email me your mailing address plus size and I will get you sweater out to you asap!
If you didn’t win no worries, I have another fun Holiday Giveaway coming soon!
A Recipe:Â
The healthiest and easiest soup recipe you will ever make! It tastes amazing and only takes minutes to make! Warm up your soul with this lovely soup.

[print_this]
Sausage, Bean and Kale Soup
Adapted from Cooking Light
Ingredients
- 4 ounces turkey smoked sausage, chopped
- 3 cups fat-free, less-sodium chicken broth
- 1Â (14.5-ounce) can no-salt-added diced tomatoes, undrained
- 6 cups coarsely chopped kale (about 8 ounces)
- 1Â (16-ounce) can navy beans, drained and rinsed
- 1 (16-ounce) can of white beans
- Salt and Pepper to taste
Preparation
Heat a large saucepan over medium-high heat. Add smoked sausage to pan; cook 2 minutes, stirring occasionally. Add chicken broth and diced tomatoes; bring to a boil over high heat. Stir in the kale. Reduce heat, and simmer 4 minutes or until the kale is tender. Stir in beans, and cook 1 minute or until soup is thoroughly heated.
[/print_this]
A How-To
I saw this adorable wreath on Pintrest and I knew I had to try and make it!

I used to be so crafty and ever since I got married I have not done as much crafty things as I would like. Pintrest has sparked a new love again!
All you need is:
*Patterned papers
*Scoring tool (scoring board, bone folder, or stylus)
*Hot glue gun
*Wreath form (I cut my own out of chipboard, but you could use a wooden one from the craft store)
*Buttons, brads, and ribbon
1. Cut stars approximately 3″ to 4″ wide using a template or die cutting machine.
2. Score a line from the top of each point straight down to the inside point. Do this for each of the five points.
3. Optional: embellish stars centers with buttons, brads, or rhinestones. I hot glued mine on.
4. I didn’t want my white wreath (which I made with foam core) form to show, so I covered it with green stars, cut just 1/2″ smaller. This is also optional, especially if your wreath form is narrower or you have more stars. You can always overlap your big stars.

5. Apply glue to the inside points on the back and hot glue to wreath form
6. Create a ribbon hanger with a piece of ribbon, and if you’re froofy like me, you can add a big, fluffy bow or two. Glue to the back of wreath.
This wreath is so easy to make and actually would be fun to make with kids!

I also did some inexpensive decorating with some frames on our mantel
I just got some cute scrapbook paper and filled each of the frames with it. Love the way it looks with the paper wreath!!

Ok time to prep the house! I am so excited to have company over
Have a beautiful FRIDAY!
]]>I took today off because I worked on Monday and ended up being really nice with my racing come up! I was able to get packed so I don’t have to stress out about doing things at the last minute.

I taught Bootcamp at 5:30am (as I do every morning now) and then went to Starbucks for a little quite time to rest and reflect. It was just what I needed! As you can see I am kind of addicted to Pumpkin Mistos + Turkey Bacon Sammies

Then it was off to pick up some last minute fuel and gear for my race as well as a few things for the many projects I am working on at our house. When I got home, I knocked one project finally off our checklist!!
I purchased all of the white frames from a friend on Facebook for $7 and I have been meaning to hang them up in our hallway for like EVER! So I did a little Young House Love prepping!!

I took old newspaper and cut out pieces the exact same size to hang up on the fall first before I nailed them. See…

Then I placed the nails in and took the paper down. SUCH A GREAT IDEA!!!

Now they just need pictures Another fun project! I also finally hung up a couple other frames and art photo that I got a couple weeks ago.

It goes perfect with the new layout in our living room.
I also brought in one of our brown chairs (temporarily we really want an over sized chair) from the fire room to the living room for a nice reading area.


The pillow that is in the above picture has been the inspiration for the entire living room, I think you are all going to love it when we are all finished. You might even see some new curtains peeking in 

In progress…TV is no longer there

Yesterday I got in my last swim of my training and today I got in my last bike ride!!!!

It’s almost here and I am not freaking out… YET! I almost have everything packed and will show you all the breakdown tomorrow.
After I got back from my quick 40 minute bike ride, I made Hubby and I dinner with mostly everything from the garden, minus the meat
One amazing BBQ Chicken Salad with fresh tomatoes, cucumbers, watermelon, grapes (from the garden), red onion (from the store) and chicken! Brown rice on the side.

I have so many more Zion pictures to show you all, but my recaps are going to have to wait till after the race on Sunday, but I do leave you with this amazing photo Hubby took of BOSCO!

Question:
What is one project you are working on at home?
Currently I am working on:
- Living Room
- Guest Room (again)
- Laundry Room (again) – needs a major makeover!
So after 2+ years of planning, killing all grass in the backyard, tilling, re-killing all of the grass, re-tilling, re-planning, and more of the same… I have finally been able to turn our backyard into something that I am proud of.
FIRST, It started in 2008 when we bought our home.


As you can see, there is a huge missing chunk of our cement patio missing. The previous owners were going to put a spa there, but didn’t. Then used the broken cement to create a flower bed, but since they didn’t have enough cement, they used other materials to finish the bed. Then you had dead trees, ugly (to me) bushes, a multitude of bricks, a backyard mostly of weeds and not grass, among other things. BLAH!
THEN, in 2009, I wanted to do some work to the yard, but I didn’t know exactly what I wanted to do or if I had the money. I started a small vegetable garden in the back right corner that was very fruitful.

I started to remove bushes and dead trees that was quick and easy for me to do. Next, I tried to remove the large chunk of cement that was left, but it was almost 12 inches thick! I couldn’t do that unless I had heavy duty tools! Also, another element that our yard lacked was irrigation. I have never installed an irrigation system before, because in the South, we have what us Southerners call… “RAIN”.
Anyways, so I re-thought a plan. Why don’t I fill that missing patio with cement, then install an irrigation system, move my garden to a different part of the back yard, redo the flower bed, and fix the grass!??!
—
STAGE 1: FIX THE PATIO
I’m so bless to work with such incredible people. Our co-worker and neighbor, TommyG was the biggest reason our yard turned out so nice. He helped me (or really, I helped him) mix and pour out the cement the redo our patio! He also taught me the art of irrigation and sodding among 5000 other things in the last 2 years!
Here’s what it started off looking like before we poured in the concrete…

And here’s the finished product…

You can see my yearly attempts to kill everything green in the yard minus the plants. We also installed a below ground fire pit because I don’t like raised ones as much and it would be easier to make.
For the total costs of this project:
Bags and Bags and Bags of Cement – Approx. $250.00.
Boards, Supports & Nails for the molding – FREE (already had)
Float, Hand tools & other Cement project type tools – Rented for 1 day – $25.00.
Bricks for the Fire Pit – FREE (already had plenty)
Labor – FREE (dinners as payment)
Cement Mixer – FREE (our work let us borrow it, score!)
Sunburn – FREE (bonus!)
GRAND TOTAL of approximately $275.00!

—
STAGE 2: STAIN THE PATIO

As you can see, when you add new cement around old cement, the texture and color looks different. Not until last month I found out that you can fix this problem for CHEAP!
First, remove all furniture and clean the patio good!

Then fix all of the cracks with cement putty.

Then purchase a cement stain. I got this color from the Home Depot. It is some good stuff. Only 1 coat and only 1 gallon!

HEY BOSCO, you’re not working hard… you’re hardly working! MOVE!

For the total costs of this project:
Cement Stain – $25.00
Roller – $2.00
Roller Handle – $2.50
Paint Tin – $3.00
Cement Putty – $5.00
Labor – FREE (me, myself and I)
Sunburn – Denied!
GRAND TOTAL of $37.50
—
STAGE 3: IRRIGATION SYSTEM
Unfortunately, I’m not always quick to remember to take photos of things that I am doing. I don’t think, I do! Anyways, in 2010, TommyG helped me do the irrigation in the front yard and with that lesson, I was able to do the backyard solo! It did, however, take me 4 months to complete because right when I was about to complete the task… Rain happened, then Winter happened! BLAH! So instead of being done in late 2010, it was more of early 2011. Anyways, I made 4 stations for the back yard. 2 for the garden and 2 for the rest.
For the total costs of this project:
Irrigation piping – Approx. $50.00
All of the values and sprinkler heads – Approx. $75.00
All of the extra parts I had to get because either I forgot or didn’t know I needed until I was doing it – Approx. $50
Tools – Approx. $25.00
Outdoor Sprinkler Timer – $55.00
Sprinkler Wiring – $20.00
Labor – Around 50 HOURS OF FREE (myself)
Sunburn – Rejected!
GRAND TOTAL of approximately $275.00
—
STAGE 4: REDESIGN FLOWER BED
So the previous owner of our house was a general contractor. And the backyard was their equipment storage, idea testing lab and lost and found among other things. To this day, I have found several hundreds pounds of BURIED concrete that I have no idea was it was buried under the ground. I also use to always find bury nails, 2 buried forks, a buried clay and other super random things. Anyways, I was left with approx. 150 brick and recently I decided to replace the halfway made flower bed and actually extend it, starting with the bricks I already had.

I went to Home Depot and bought an additional 450 bricks to complete the project.

For the total costs of this project:
450 Red Clay Bricks – $150.00
Labor – FREE (myself)
Sunburn – No Mas!
GRAND TOTAL of approximately $150.00
—
STAGE 5: SODDING
So this was the beast that took an entire Saturday while Bobbi was out at the Ragner Relay. For 2 years, I have wanted this, but I needed to first complete my irrigation system, then kill all of the grass/weeds, finish my flower bed, get out my tiller and work the yard and lastly remove all dead grass and level the land.
So I had about 1000 sqft that I wanted to cover with sod and so I got a quote. $750 to sod my back yard. That comes out to $0.75 per sqft for all of the sod, delivery of the sod and installation of the sod. Now, I do hear that that isn’t a bad rate for nice new sod, but I didn’t want to pay that! So I did some research. There is a company in a nearby city that offers sod for $0.30 per sqft! And on top of that, if I order 1000 sqft, they would deliver the sod to my house for FREE! So, in an effort to save $450, I decided to do it myself! Talk about trial by fire! This was the first time I had ever done anything like this and with some advise from TommyG on what my game plan should be, I went head on.


WOW, I can’t believe I did all of this by myself in just one day! I had to bring 2 pallets worth of sod from the front yard to the back yard, place, cut and fit all of the sod together. I actually purchased a back brace because I knew it would get a workout!


My dream has come true!! I also added a brick step off on the north side of the porch, added brick around our orange tree, and added mulch to put the finishing touches on everything!
For the total costs of this project:
Sod (with tax) – $325.00
Delivery – FREE
Back Brace – $25.00
Grass Cutter – $4.00
30 Extra Bricks – $9.00
30 Large Stepping Bricks – $24.00
2 Bags of Mulch – $10.00
Other Tools – FREE (borrowed)
Labor – FREE (myself)
Sunburn – @*$%@!, It got me.
GRAND TOTAL of under $400.00!!!!
—
So let’s recap:
Patio – $275.00
Stain – $37.50
Irrigation – $275.00
Brick Flower Bed – $150.00
Sod – $397.00
GRAND TOTAL – $1134.50 (all over a matter of a year from start to end)
——-
SO WHAT’S NEXT?!?!


To finish the creation of our new vegetable garden and to also start to put it in use! More to come soon!
]]>